
If you’re a fellow interpreter trainer and you’ve dipped your toes into the online training waters, it probably won’t have taken you long to realise that teaching consecutive is relatively straightforward, but simultaneous is less so.
I’ve tried Skype calls, and I have extensive experience with Zoom. I’ve also been fiddling with the Zoom interpretation feature and testing a variety of other apps. Today I’m going to tell you about Watch2Gether.
I haven’t hit upon a definite solution that works in every situation yet. Most solutions are mash-ups or workarounds, and they often involve multiple devices.
The holy grail for me is a solution that would allow me to do the following:
- Listen to the input and output simultaneously, i.e. the speaker or video and the interpreter.
- Adjust the volume of each track independently, so I can have a louder or softer interpreter.
- Make sure that the interpreter(s) and I both have good quality sound.
- Ensure that the interpreter and I are listening to the same bit of the speech at the same time.
- If I’m working with a group, make sure that everyone can hear the same speech at the same time (i.e. that people logging in from different locations don’t have different lag times).
All of these may sound like sine qua nons, but alas, they’re not. And if I can’t do all these things, I can’t properly assess the content or the interpreter’s technique (especially when it comes to décalage).
If you’ve tried teaching simultaneous on a platform like Zoom, for instance, you’ll have encountered various irritations, such as students in breakout rooms not being able to hear a video played in the main room, varying lag times for students in different places, not having a way to adjust the speaker’s volume and interpreter’s volume independently, etc. etc.
I can’t solve all these problems for you in a single blog post, so today I’ll focus on one way to run a simultaneous interpreting class, primarily using video material (but a live speaker would work too).
You will need to access a website called Watch2Gether at w2g.tv.
Watch2Gether
You may have encountered Watch2Gether as a way to have a movie party with friends during lockdown, sipping cocktails and commenting on the latest episode of Game of Thrones.
And yes, it’s definitely a way to Netflix (without the chilling). But it can also be subverted as a non-Zoom, non-Skype, single-device way of running an interpreting class.
SPOILER ALERT: it has a major disadvantage relating to the source material you can use. I’ll tell you about that in a moment.
Here’s how it works.
Go to the Watch2Gether website. You don’t need to create an account, and it’s free. Here’s what you will see:
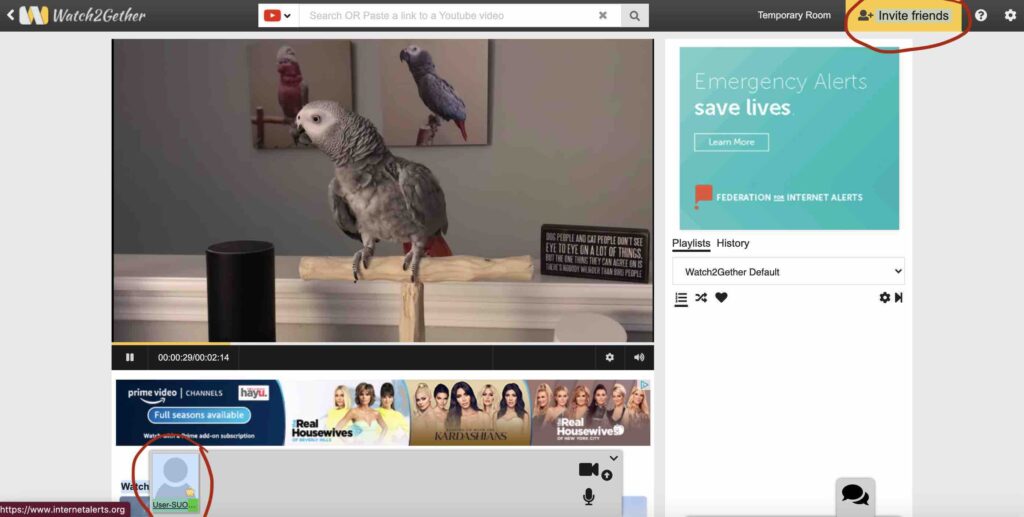
Some points to note.
The room created is private by default and is deleted after 24 hours.
At the bottom left (circled in red), you can see my avatar. I haven’t uploaded a photo, but you can see a gold crown, showing I’m the room host. The username is generated randomly, but you can click and change it to something more suitable (you’ll see I’ve renamed myself Sophie Ll S here):
If you create an account (still free), your avatar will retain your username and you can keep your room permanently (meaning that you can save playlists of videos, for example, i.e. you could prepare suitable teaching material and place it in a playlist, in readiness for a class – or several, since you can have several playlists).
You can invite as many people as you like to join the room, using the ‘invite friends’ button (in yellow, top right of the screen). If you click on it, it generates a link that can be copied and sent to your students by any means you like (email, text, WhatsApp, etc.).

When others join the room, their avatars will also be visible along the bottom of the screen. They can also change their assigned usernames.
Choosing source material (video)
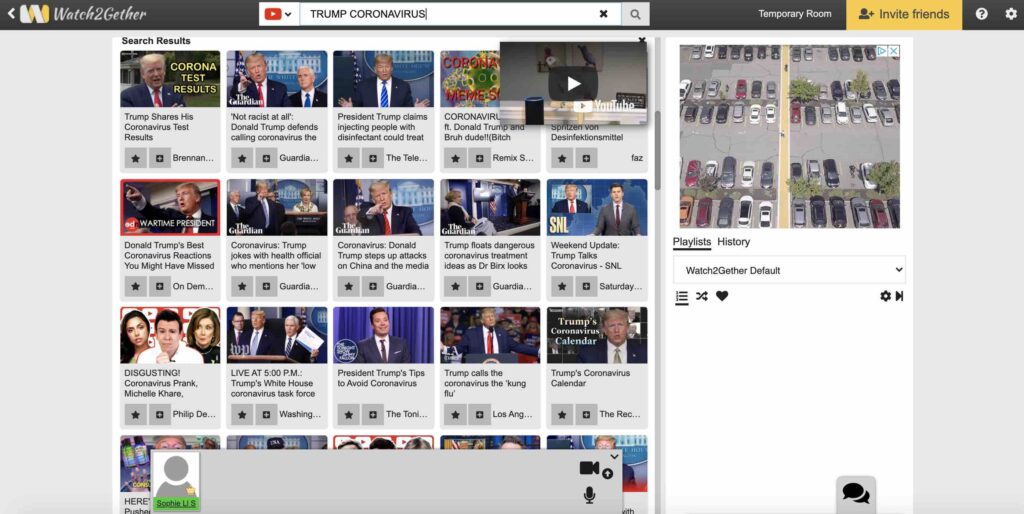
Watch2Gether supports a number of sources of video material, including Youtube and Vimeo, as you can see in the image below.

You can simply enter keywords in the search box to look for suitable videos. Here I’ve searched for ‘Trump coronavirus’ in the Youtube videos:
Or if you already know the url of a suitable video, you can just enter it into the search box.
You can also queue up a series of videos by putting them in a playlist, thus allowing you to prepare a whole class’s worth of material. In the screenshot below, you’ll see I’ve made a playlist with three clips about energy. You could create multiple playlists to prepare several classes in advance.

Watching the video
At this point, all you have to do is press play, and everyone in the room will watch the same video at the same time. Watch2Gether synchronises the playback function. No need to play the video in two or more places (on the trainer’s device and on the student’s device) while trying to synchronise by counting ‘1, 2, 3’.
Caveat:
By default, everyone in the room can press pause at any time, or select another video!
However, the host (i.e. the trainer, who’s created the room), can disable various functions to avoid chaos in the virtual classroom, by using the Settings (top right).
Have a look at the screenshot below, which shows you what the host can do by using the ‘Enable Moderation’ function.
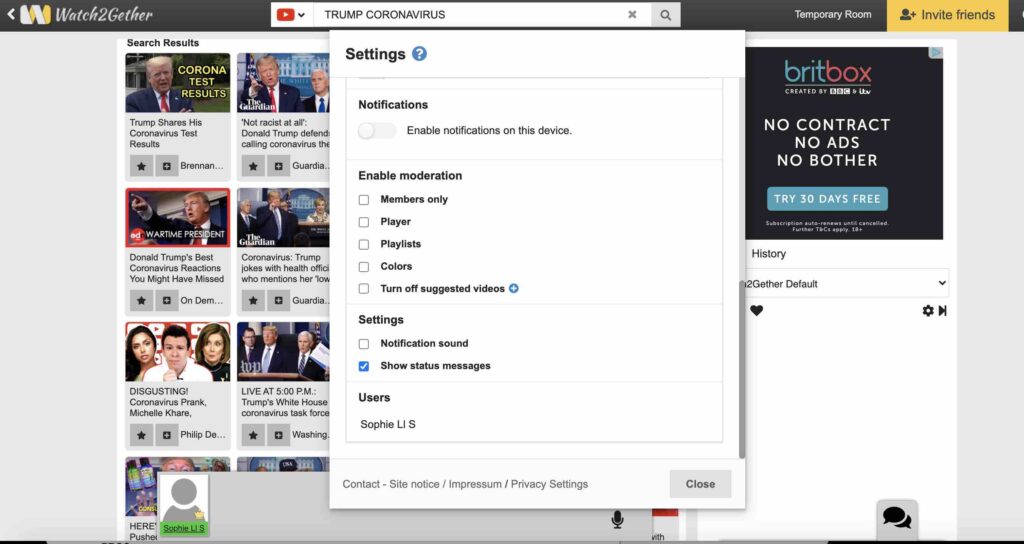
- Members only: the room host has to approve people who want to join the room.
- Player: Only the room host can select videos and control the playback of a video (play, pause, seek…)
- Playlist: Only the room host can change playlists.
- Colours: Only the room host can change the appearance of a room (colours and background image).
Interpreting
If you want to be able to see your students, ask them to switch on their camera. Definitely ask them to turn on their microphone, using the settings on their avatar button at the bottom of the screen.
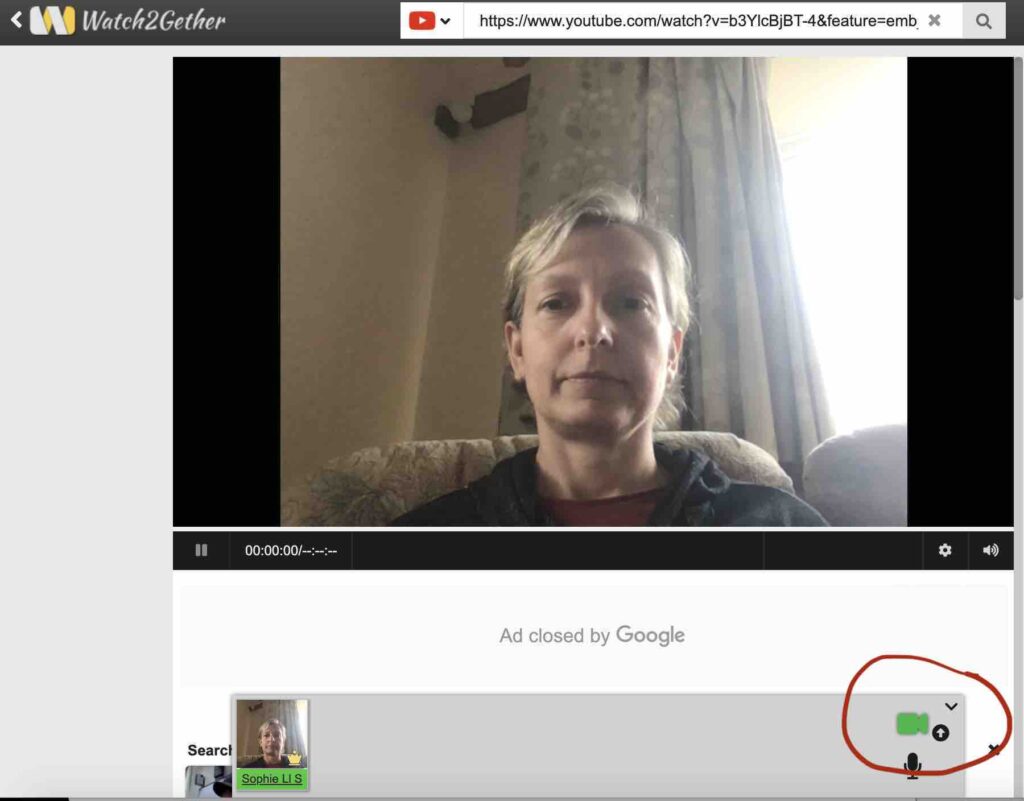
On the following screenshot, you’ll see that I have clicked on the video icon, making it turn green, so that my camera is switched on. I’ve circled this in red so you can find it.
I’ve also clicked on my avatar (bottom left) to show you that I can place myself in the middle of the screen, so I’m more visible to my students.
Obviously if I were playing a video for interpreting practice, I wouldn’t put myself in the middle of the screen! To start, I would click play to start the video, and adjust the volume of a) the video (using my computer audio settings), and b) each individual interpreter, using the little microphone icon on their avatars.
If you are finding the avatars a bit small, you can enlarge them, which gives you more control over the volume setting. Here’s a shot of the bigger avatar; you can turn it into a thumbnail and move it around the screen:
Now, to listen to interpretation: let’s say I have 5 students in the class. I would turn 4 of them down to zero volume (mute), and turn up the fifth’s volume.
I’m now watching the video, hearing the video’s audio track, and listening to an interpreter at a volume of my choice. If I want to swap to another interpreter halfway through the speech, I simply turn down the volume of Interpreter 1 (to zero), and turn up Interpreter 2.
All the participants are able to do the same.
This feature also makes it possible to have a live speaker instead of a video as source material: simply have two participants’ volumes turned up (to a level of your choice).
One more useful feature: there is a built-in chat box (bottom right, see screenshot for the speech bubble icon circled in red), so you can type in vocab, links, etc.

The downside
OK, where’s the downside?
So far, it’s all good. You can play videos, have a live speaker, listen to your students in turn without having to enter and exit breakout rooms, adjust the volume (it’s not as flexible as true twin track, but it gives a lot more flexibility than the Zoom interpreting feature, where the original sound is around 20% and the interpreting at 80% volume, but you can’t control it at all), use the chat box, prepare material in advance…
Where’s the catch?
I’m sorry to say, the catch is in the limitations on source material. After all, the platform was designed for watching TV and films with your mates, not for interpreting practice.
My first thought was that some of my usual sources of practice material, namely the SCIC Repository and Speechpool, would be ruled out. Anything protected behind a login (e.g. Speechpool material) is a problem, and the europa website which hosts the SCIC Repository is (obviously) not one of the apps supported by Watch2Gether.
However, hold tight because I’ve got the solution!
Speechpool
At the moment, Speechpool videos are hosted on Youtube, which allows you to get round the Speechpool login issue. Here’s how you can watch them on Watch2Gether. The method is a little roundabout, but effective.
Login to Speechpool. Find the speech you want.
In the bottom right hand corner of the video window, you’ll see the Youtube symbol. Click on it to view the speech in Youtube.

Copy the url from the address bar and paste it into the search box in Watch2Gether.
Voila!
SCIC Speech Repository material
This is a different story. It requires more effort to set up than the Speechpool workaround, but it’s doable.
Go to the SCIC speech repository. Choose the video you’re interested in. Here’s an example:
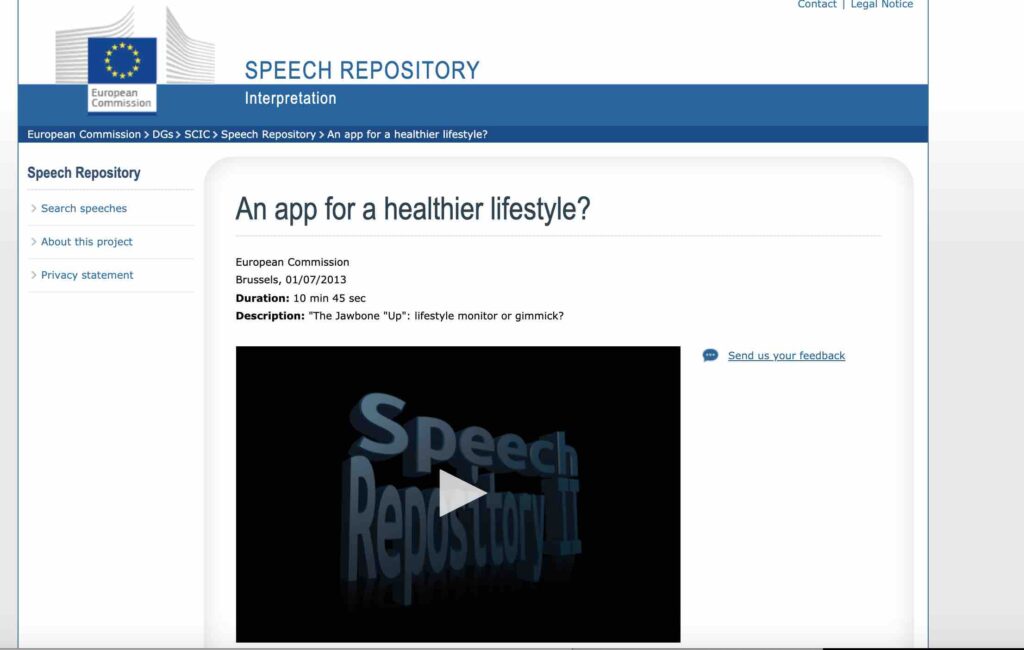
Copy the url and paste it into the search box in Watch2Gether.
Because the europa website isn’t one of the apps supported by Watch2Gether, you (and everyone else in the room) will need to instal a browser extension on Firefox or Chrome to be able to watch this video.

Each user must now click on Open. The video will then open in a separate window, W2gSync will detect that video and makes sure that playback is in-sync with every user in the room.
So far, so good. When I tested this with a colleague, I was able to control the Play, Pause and Seek functions, playback was synchronised, and there was no time lag.
One disadvantage: because you’re now working in a new window (clicking on the Play/Pause controls in the WAtch2Gether window will not synchronise playback), it’s trickier to see the chat box.
There is a way around this, using the ‘Link’ feature in the Watch2Gether window, but I found it didn’t work, probably because of the way the europa website is designed (the ‘Link’ feature won’t work with Flash, for example).
Summary
OK, I’ve given you a lot of explanations and screenshots, which make the whole thing sound complicated, but it’s really not.
The massive plus, from my point of view, is that I can switch my online coaching and group calls to Watch2Gether and do things I can’t do on Zoom: synchronise playback, hear both audio feeds and adjust the speech and interpretation volumes separately, allow several interpreters to work from the same speech at the same time.
Best of all, I can do it all on one device, without messing about with a tablet or mobile, two sets of headphones, a mixer, or anything else.
PROS of Watch2Gether
- Free
- Relatively simple to use
- Suitable for 1-1 sessions or groups
- Only one device needed
- Unlimited number of participants
- Easy replay/pause of video, allowing you to check sections of the speech
- Volume of speech and interpreter can be adjusted separately
- Built-in chat function
- Host can disable certain functions to stay in control
CONS of Watch2Gether
- Limited options for source material (Youtube, Vimeo), but there are workarounds
- There is no recording feature, so you can’t record students’ performances from within the app (unlike Zoom, for example). You could get around this by using screen recording software.
- There is no screen sharing facility or whiteboard.
- No breakout rooms; but as described above, you don’t need them.
- No more than 10 video cameras can be on at any time, so you can’t see everybody’s face in a large group
- Ads – they’re annoying, but we’re all used to tuning them out. You can get rid of them by signing up to w2g.tv PLus, but this doesn’t offer any real benefit in terms of features
Let me know what you think!
Sophie Llewellyn Smith, writing as The Interpreting Coach, is a coach, interpreter trainer, conference interpreter, designer of online teaching materials, and creator of Speechpool. Follow the blog to pick up tips on how to improve your interpreting skills, sign up to my flagship membership site for English retourists, Rock your Retour, and check out the website for digital material to complement your face-to-face learning and empower you to take control of your learning. If you’re interested in personal coaching, feel free to book a free discovery call (although my availability is very limited at the moment).